
12 min read
Product Update, June 2023
Precoro rolls out hot summer updates to integrations, supplier management, filtering, and document handling. Check out what’s new.
Revision History in receipts
We have added the Revision History function for receipts to help you easily track and review any changes made to receipts over time.
Here are the document-level changes that can be tracked using the Revision History function:
- Status
- Supplier Receipt #
- Receipt Date
- Location
- Receiver
- Post to Warehouse
- Document Custom Fields
- Note
- Attachments
Changes that can be tracked in the item line include:
- Item Row
- Description
- Received
- Quantity
- Invoiced/Waiting
- Items Custom Fields
To see the revision history for receipts, follow these steps:
- Go to the Receipts page and open the document in which you want to track revisions;
- Press the Revision History button in the right action panel;
- Mark two revisions and press the Compare Revisions button at the bottom.
New features for managing suppliers
Enter the full information in supplier requests
Now users can enter complete supplier information when requesting to add a new vendor to Precoro. The updated request form contains the same information as the one you fill out when creating a new vendor on the Supplier Management page.
💡 Even if users don't have the Suppliers and Items role, they can still use this feature as long as they have an activated Create role for a specific document type.
To submit a request, follow the steps below:
- Go to Configuration → Basic Settings → Documents Setup → General Settings → activate the Allow Document Creators to Add New Suppliers checkbox.
- Create a new purchase order, invoice, or purchase requisition document.
- Click on the Add new supplier button located in the Supplier field and input the necessary information. The supplier with a Pending status will be immediately added to the document. Then, depending on the approval workflow your company has set, the supplier will go through the confirmation process.

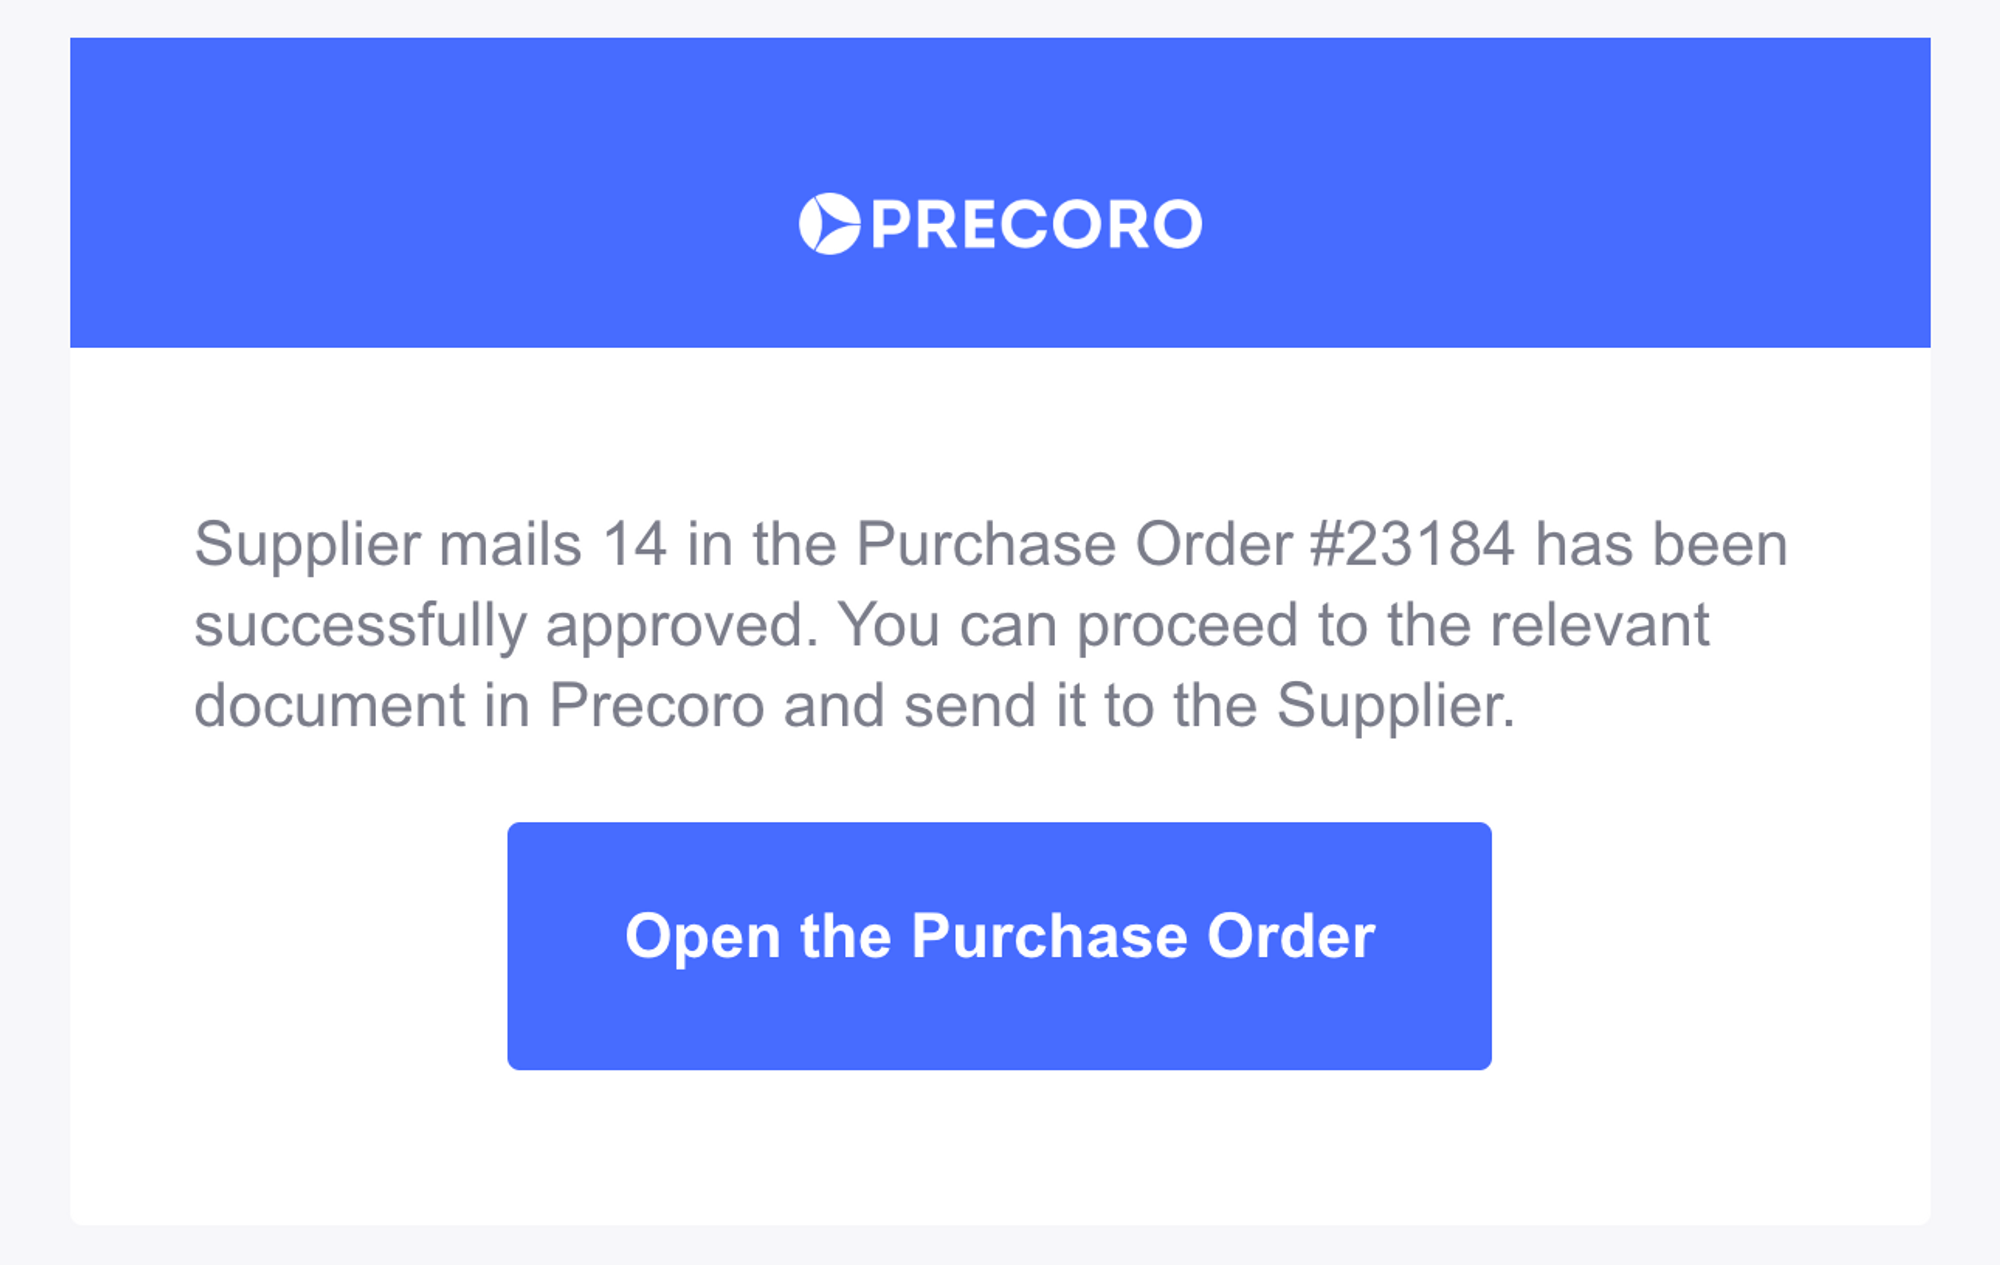
You will receive an email when the vendor is approved.
Additionally, now the purchase order creator, regardless of whether they are the requester or not, will receive an email notification informing them about the supplier's approval or rejection status.
📖 To learn more about submitting a request for creating a new supplier, please refer to this resource.
Send invitation forms after creating a supplier
Starting with this update, you can send invitation forms to suppliers even after you’ve added them to Precoro.
To send an invitation, please follow these steps:
- Go to the Supplier Management page and select the supplier to whom you want to send an invitation.
- Press the Send Invitation Form button on the right-hand side of the supplier card.
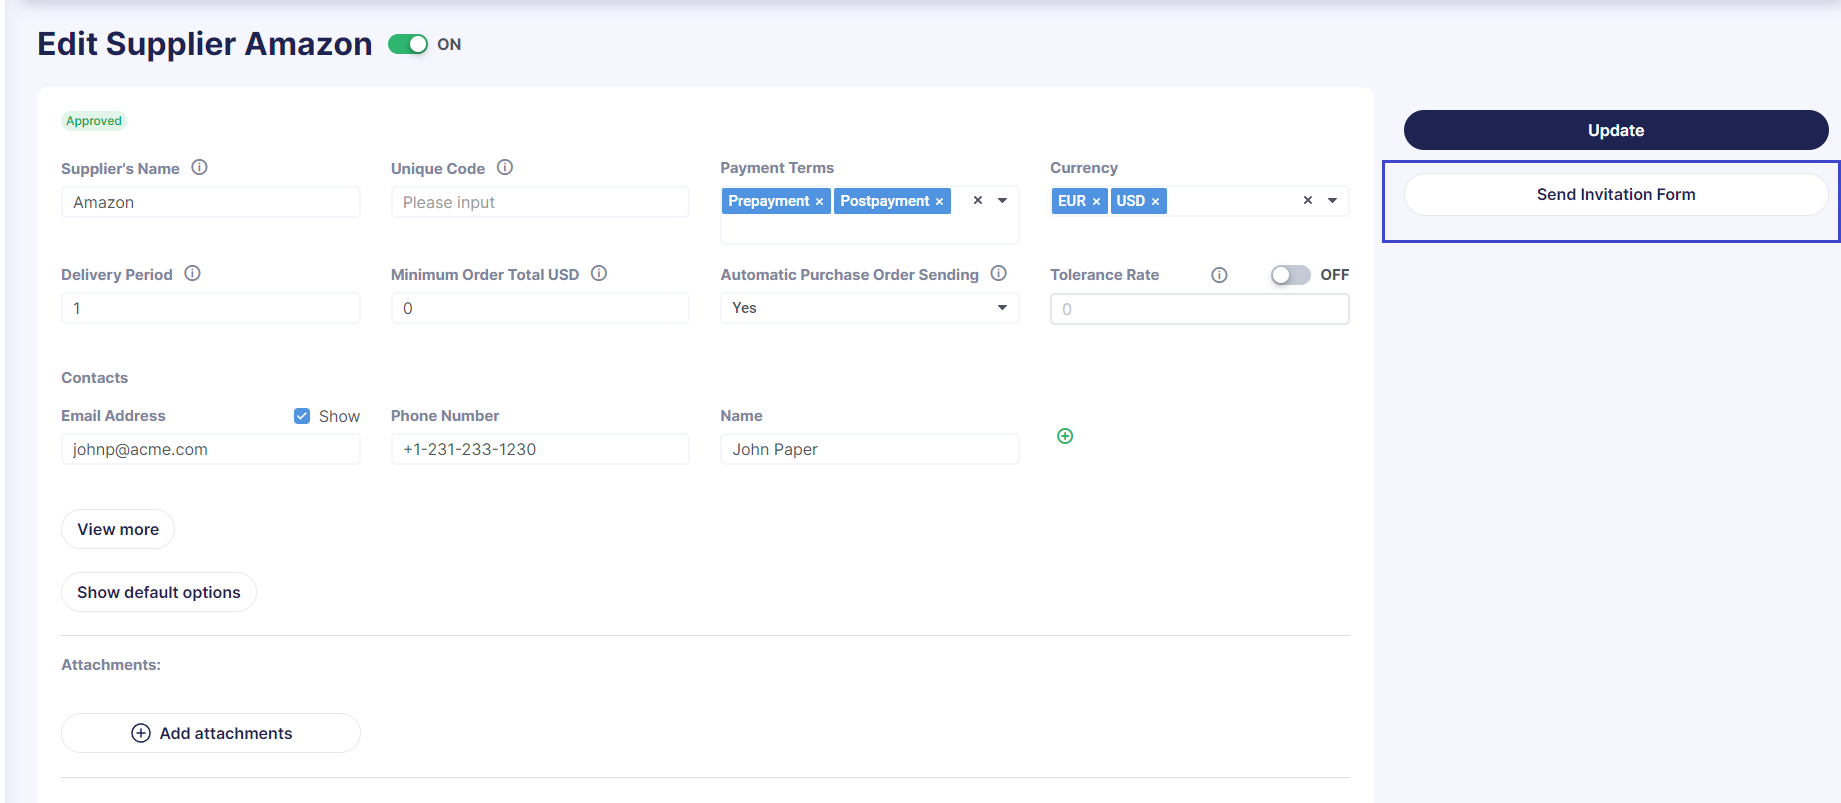
💡 Please note that this button is only available for suppliers with either Pending or Approved statuses. If the supplier is in Pending status, the form can be sent only by the approver. If the supplier is in Approved status, any user with the Suppliers and Items role can send the form.
- After clicking the button, you will be directed to the New Supplier Invitation page. Here, you can choose the form and send it to the supplier. If you have previously specified the supplier's email and name information in the supplier card, it will be automatically filled in the form.
Once you receive the form back from the supplier, you can continue working with it on the Sent Invitations page. You can also use the Send for Revision option to send the form back to the supplier for further consideration.
If you reject the form, the supplier will be marked as Rejected. If you approve the form, the supplier's card will be automatically updated and they will go through your company's approval workflow.
💡 Please note: Re-approval will not be triggered if the supplier is in the Pending status and some approval steps have already been completed. However, if you send the form to the supplier with the Approved status and confirm it, the supplier will undergo the re-approval process.
Customize supplier display on pages
You can now customize the order in which suppliers will display on different pages. To do so, simply go to Configurations → Basic Settings → Misc → Sort Suppliers by and select one of the four options.
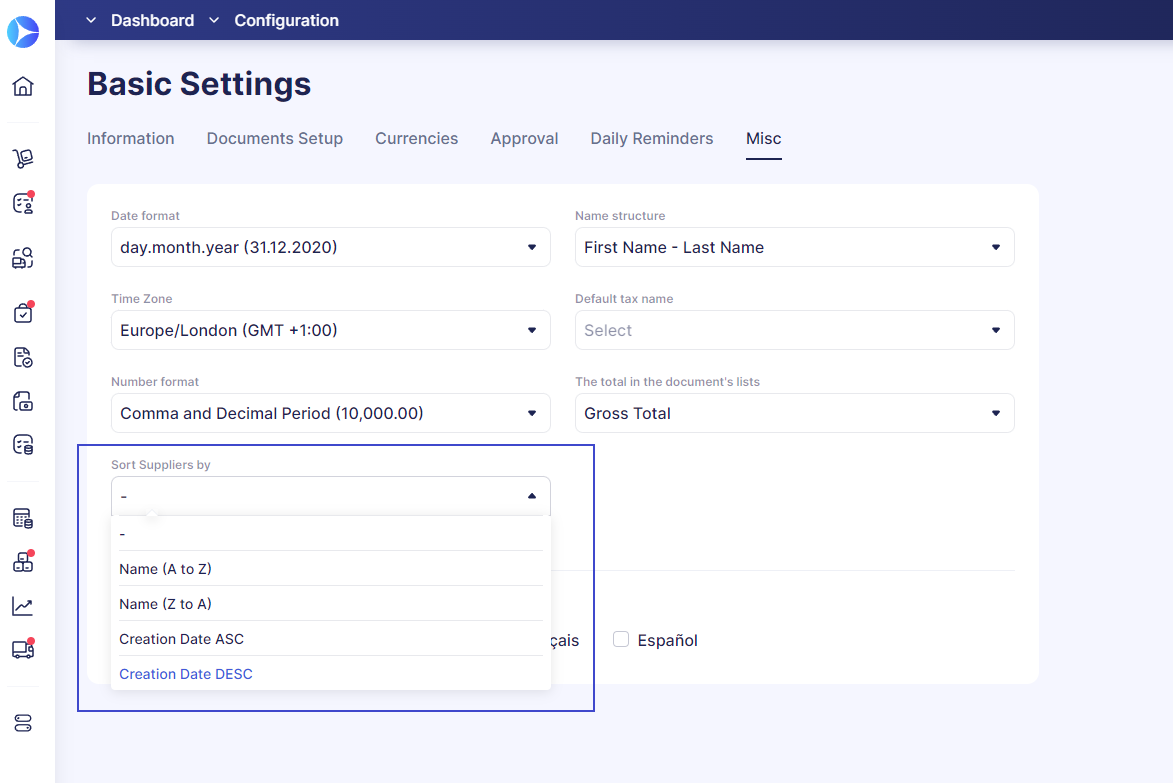
This customization applies across various pages where the filter is used, including document lists, preset and custom reports, as well as the pop-up for adding items. By default, suppliers are sorted in ascending order based on Creation Date (ASC), starting from the oldest to the newest entries.
New filtering options
Filter catalog items in Inventory Consumption
Starting with this update, adding items to Inventory Consumptions has become quicker and easier. Now you find the desired items by filtering them based on categories and item groups.
Here’s how these filters work:
- Category filter: enables you to quickly narrow down your search and locate items within specific categories.
- Group filter: allows you to search for catalog items within specific item groups.
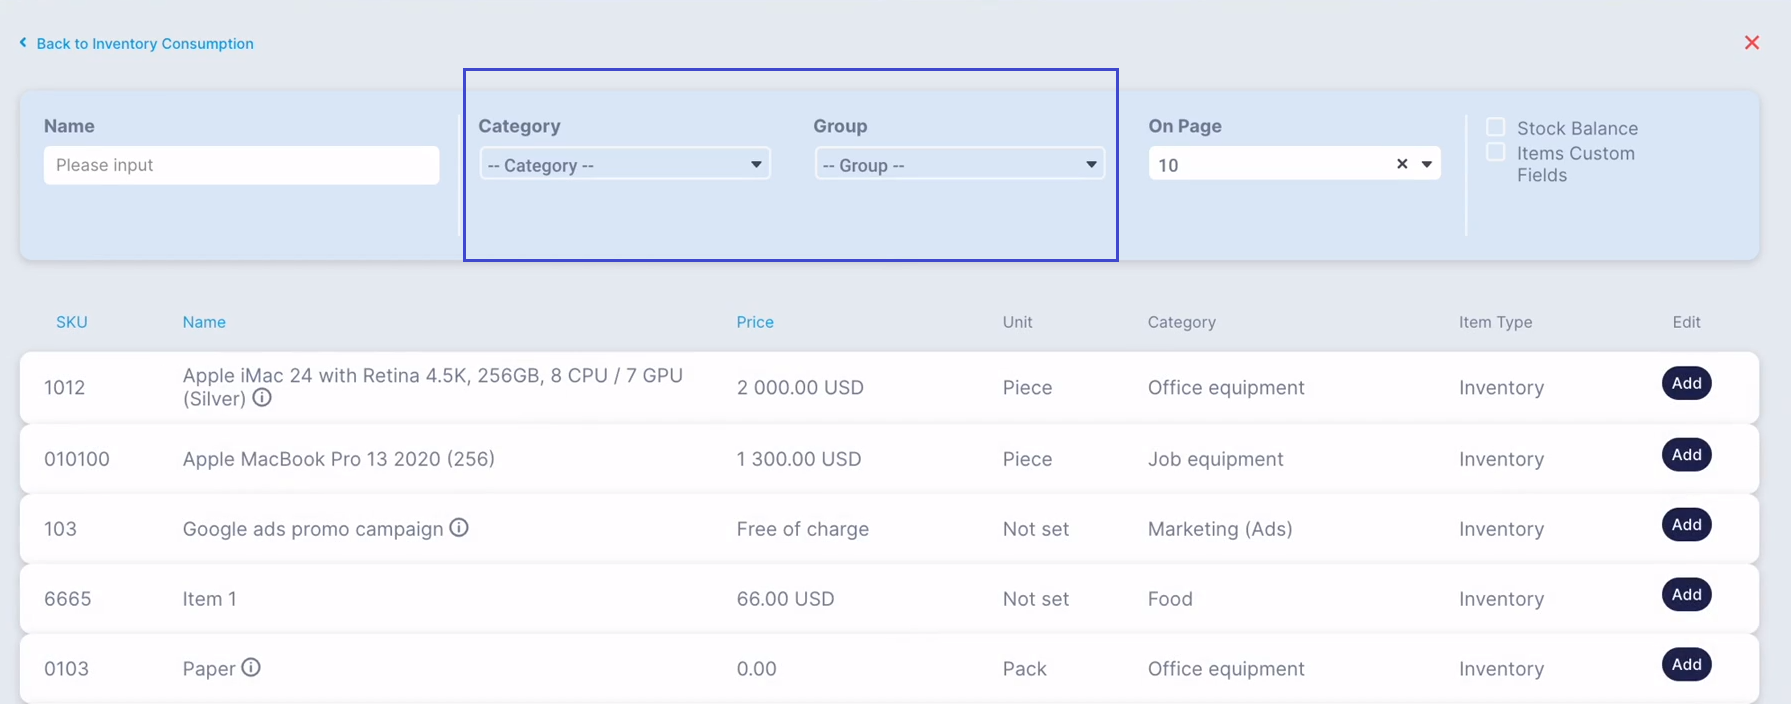
💡 Please note that the Category and Group filters won’t be displayed if no categories or groups have been assigned to the items.
Filter suppliers by their portal registration
We’ve added a new filtering option that allows you to sort suppliers based on their integration status with the supplier portal. This means you can quickly identify which suppliers are integrated and which are not.
To do that, please follow these steps:
- Navigate to the Supplier Management page.
- Open the advanced filters and select either Yes or No in the Suppliers Portal field.
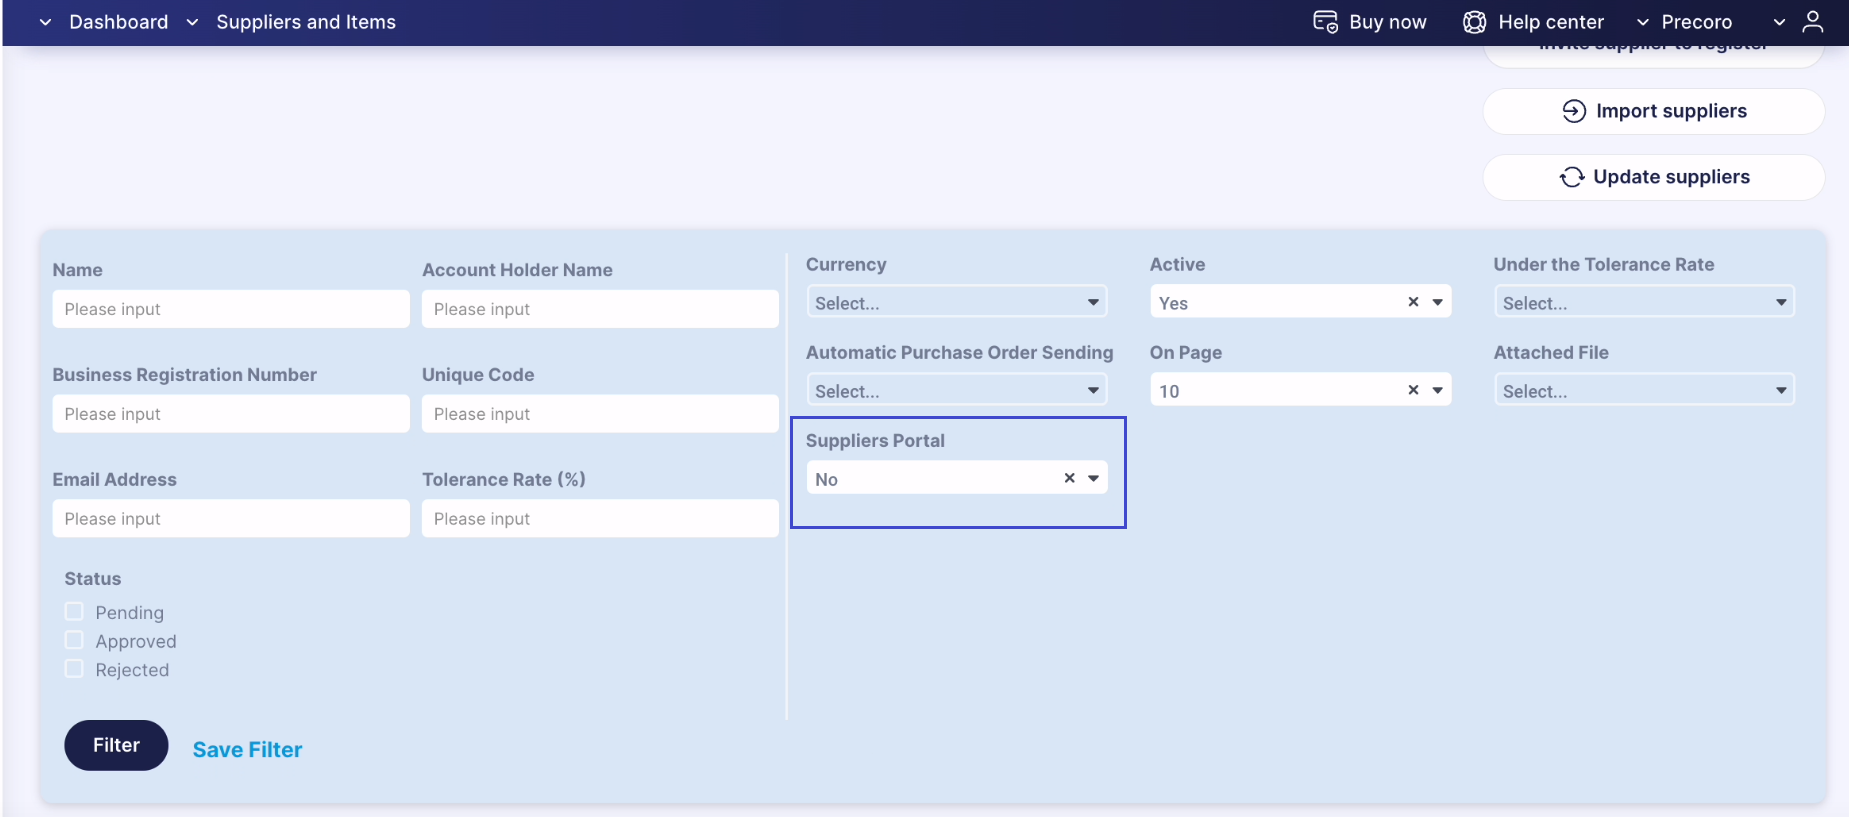
💡 Please note that the Suppliers Portal filter is only available if you have at least one supplier in the portal. If not, this field will not be displayed.
New in integrations
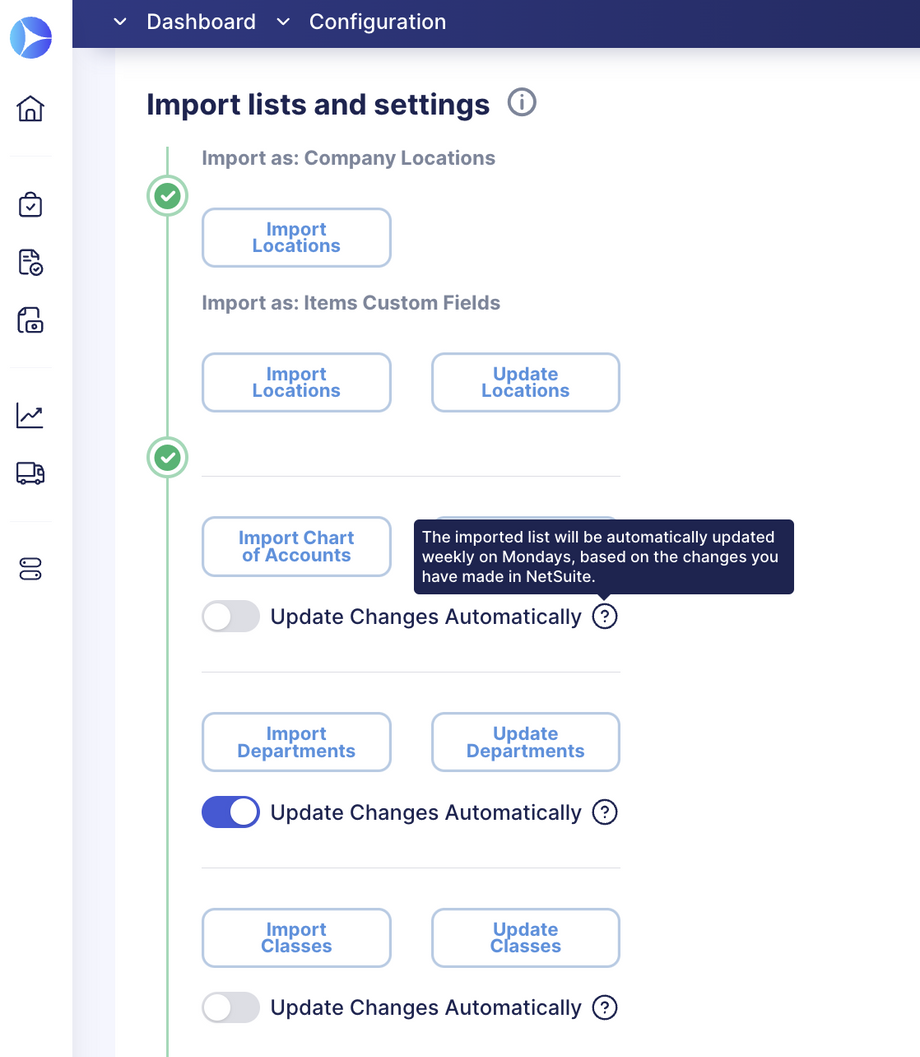
NetSuite auto-update
You can now turn NetSuite auto-updating on or off right from the Integrations page. This functionality is designed to free you from the tedious and repetitive tasks of constant data updates.
💡 Updates occur weekly on Mondays.
To enable or disable auto-updating, simply utilize the toggle located on the left side of the Update Changes Automatically option. A blue toggle represents an active status, while a gray toggle indicates a deactivated status.
Improved search functionality when importing Xero data
Working with Xero integration has become even more efficient. Now you can use the Search functionality when importing the following lists into Precoro:
- Chart of Accounts
- Departments
- Classes
- Customers
In the Import Chart of Accounts specifically, you have the ability to search by both Name and Code. For all other import options, the search can be performed solely by Name.

Webhooks update
You now have the flexibility to enter up to 5 unique webhook endpoints, allowing you to connect with different services or applications.
Additionally, all your created webhooks can be easily managed from one centralized Configuration page. Here, you can view the current webhooks along with their activation status. You also have the option to edit any webhook by clicking on the pencil icon.
📖 To learn more about using webhooks in Precoro, follow this link.
Improved mapping for Amazon catalog items
With the updated process of working with Amazon integrations, you can now set it up so that item fields are automatically filled in when creating documents. Additionally, now new items can be added automatically to the Precoro Catalog. Let’s take a closer look at how this works.
Map existing items with the Precoro Catalog
When you create a new purchase requisition or purchase order from Amazon, Precoro will automatically map the items with the ones already existing in the Precoro Catalog. This eliminates the need for manual entry of custom fields for items (ICFs).
If the ICFs in the catalog match the ones activated in the documents (i.e., both Items and PR or PO are checked in the ICF settings), the system will automatically enter those values when creating a document from Amazon. For a deeper understanding of how to work with ICFs in Precoro, refer to this resource.
If certain ICF values are not assigned in the catalog, Precoro will search and input the default values you've set for the supplier. To learn more about setting default values for suppliers, check this article in our Knowledge Base.
The mapping process includes the following values:
- Name + SKU + Supplier + Currency: Used when a supplier is assigned for the item, and you have enabled the SKU.
- Name + SKU: Used when the item has no assigned supplier, and you have enabled the SKU.
- Name: Used when the item has no assigned supplier, and you have disabled the SKU.
If an item is not found in the catalog, it will be added as an empty row, and you'll need to assign all the ICFs manually.
You can find more on setting SKUs here.
You can also automate your workflow even further by enabling the Automatically Add Items to the Catalog parameter on the Amazon configuration page.
Once this parameter is activated, any new items will be automatically added to your Catalog. However, new items will not be added if the parameter is deactivated.
Improved mapping for Afaxys catalog items
You can also now automate the task of filling in item fields when creating documents from Afaxys. Moreover, any new items you create will seamlessly integrate into the Precoro Catalog. Let's delve into how this works.
Map existing items with Precoro Catalog
When you create a new purchase requisition or purchase order from Afaxys, Precoro will automatically map the items with the ones already existing in the Precoro Catalog. That way, you no longer need to manually enter custom fields for items.
If the activated custom fields for items in the catalog match those in the documents (i.e., both items and PR or PO are checked in the ICF settings), the corresponding values will be automatically populated when generating a document from Afaxys. For more information on working with ICFs in Precoro, refer to this resource.
If the custom fields for items are not assigned in the catalog, Precoro will search and input the default values you've set for the supplier. For more information on setting default values for suppliers, please refer to this article.
The mapping process includes the following values:
- Name + SKU + Supplier + Currency: When a supplier is assigned for the item and you have enabled the SKU.
- Name + SKU: When the item has no assigned supplier and you have enabled the SKU.
- Name: When the item has no assigned Supplier and you have disabled the SKU.
If the item is not present in the catalog, it will be added as an empty row, and you will need to manually assign all the custom fields for items. More information on setting the SKU can be found here.
You can automate your workflow even further by enabling the Automatically Add Items to the Catalog parameter on the Afaxys configuration page.
With this parameter activated, all new items will be automatically added to your catalog. However, new items will not be added to the catalog if the parameter is deactivated.
The ability to cancel Inventory Consumptions
Users now have the ability to cancel previously created Inventory Consumptions (ICs). Follow these simple steps to initiate the cancellation process:
- Open the specific IC record that you wish to cancel.
- Press the Cancel button in the right action panel.
- Provide a reason for the cancellation in the prompted field and then click Yes to proceed. 💡 Please note that only consumptions with a Completed status can be canceled.
Once the IC is successfully canceled, it will be assigned a Canceled status. Additionally, the associated stock transfer will automatically acquire a Canceled status as well.
To ensure proper handling of the items, a new transfer will be generated to facilitate the return of the items to their original warehouses. In cases where usage involves multiple warehouses, there will be separate stock transfers, one for each warehouse.
Better purchase requisition to purchase order conversion
Converting a purchase requisition document into a purchase order is now easier than ever with just a single click.
To initiate a conversion, please follow the steps outlined below:
- Click the Create Purchase Order button in the right action panel of the purchase requisition document. 💡 Please note that the button will only appear after the document has been Confirmed or Approved (in case you have an approval workflow in place).
- Fill in the information for the PO and when you're ready, click Create to proceed. Once done, you’ll have a new PO with all the items added from the PR.
If the purchase requisition contains multiple suppliers, the system will provide you with the flexibility to select each supplier individually, enabling the creation of separate purchase orders for each one. However, if you did not specify any suppliers in the PR, the system will prompt you to choose one.
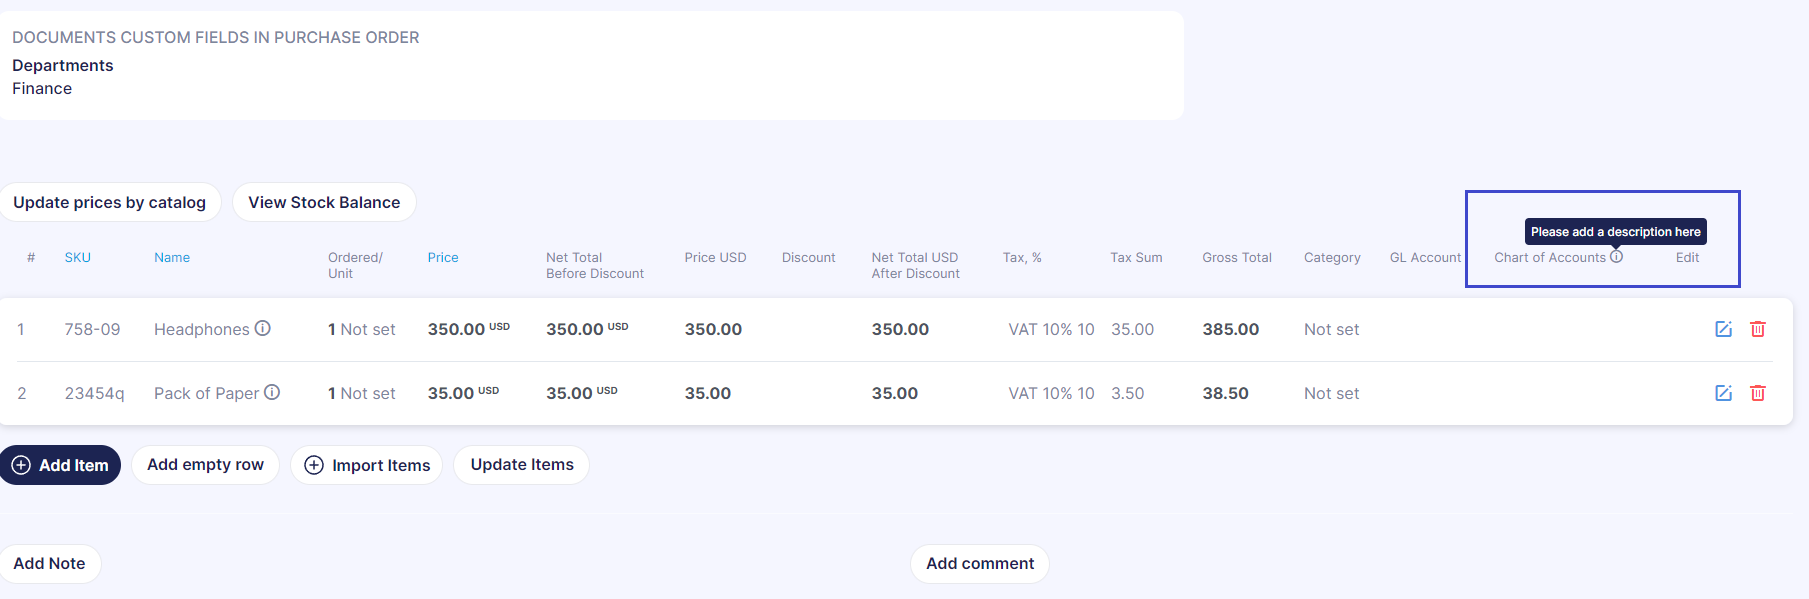
The option to add descriptions to custom fields
Now you can add descriptions to the custom fields to provide guidance to your users when they create documents with those fields. This will ensure that employees know exactly what information needs to be entered.
To add a description, please follow these steps:
- Navigate to Configuration and click on Items Custom Fields or Documents Custom Fields.
- Select the custom field you want to edit.
- In the Settings section, enter the description and press the Update button below to save the changes. 💡Please note that the Description field has a character limit of 255.
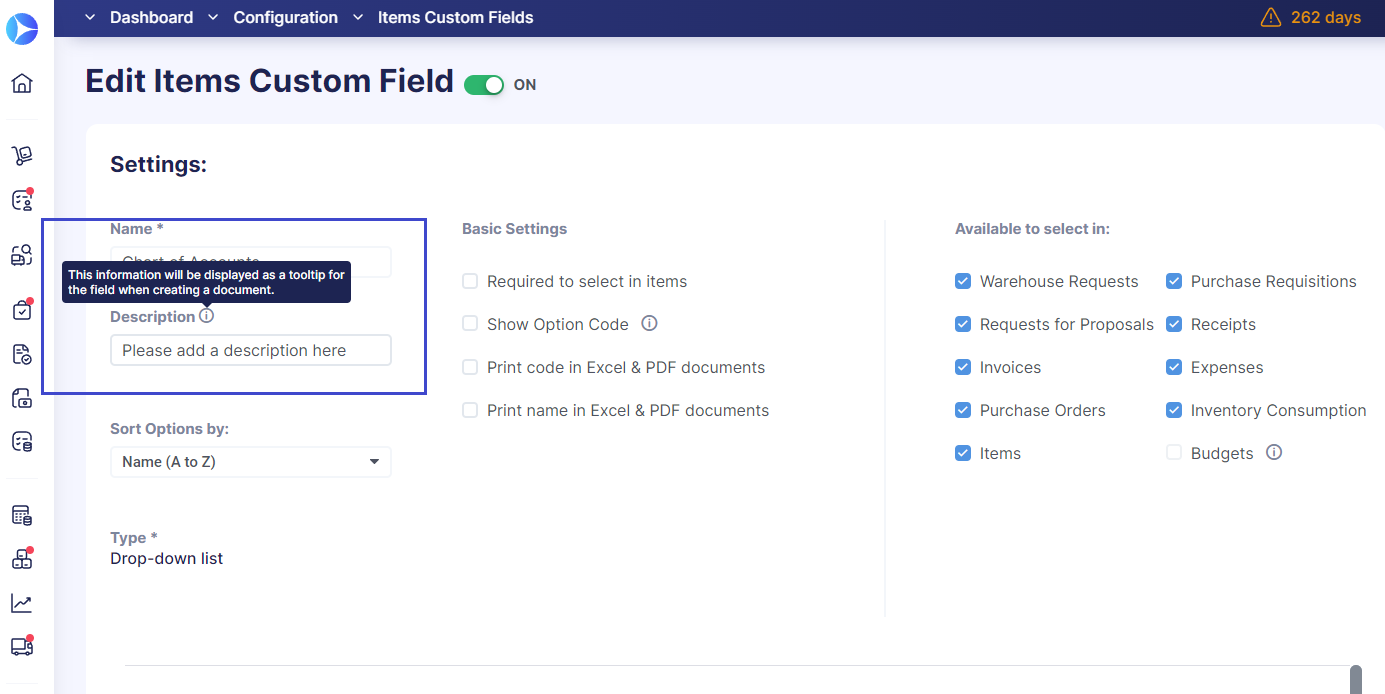
Once the description is added, users will notice an icon displayed next to the field's name within the document. Hovering the cursor over the icon will reveal the tooltip text that will provide users with instructions. If the Description field is left empty, no such icon will be displayed.
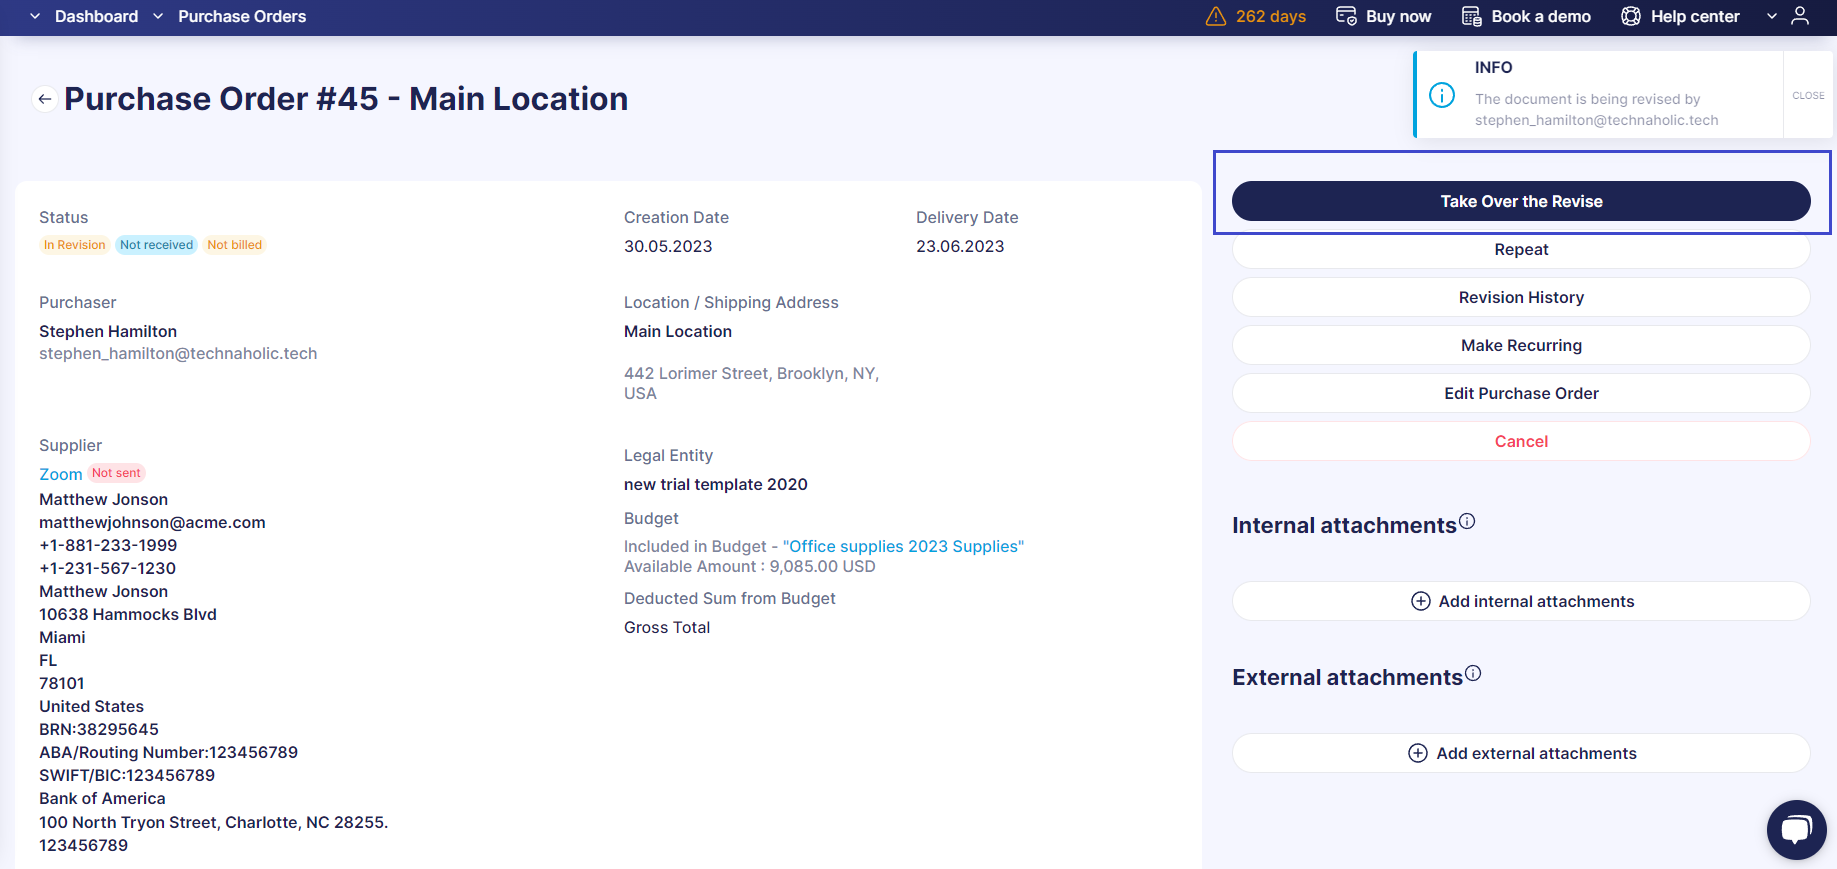
Super User updates
Super Users now have the option to take over the revision process, even if another user initiated it.
To learn more about the Super User role, follow this link.
To initiate the revision swap, please follow these steps:
- Ensure that you have the Super User role, which is needed to perform this action.
- Open the document with In Revision status.
- In the right action panel, click on the Take Over the Revise button. This will make you the new document reviser, allowing you to proceed with further work on the document. 💡Please note that other users will be unable to perform any actions on the document until you complete the revision. The initial reviser will receive an email notification informing them of the revision swap.
Moreover, now employees with the Super User role can edit email addresses on the User Management page. Specifically, they can modify the emails of other registered users who have already confirmed their inboxes. Upon making changes to the email addresses, a confirmation notification will be sent to the respective users' newly entered and saved email addresses.
Privacy Policy update
As part of our commitment to transparency and compliance, we have recently updated our Privacy Policy with a specific focus on data retention. This update covers the following important aspects:
- Personal data we collect;
- Data storage duration;
- Purpose of personal data collection; and
- Data destruction.
📖 We encourage you to carefully review our updated Privacy Policy for complete details. You can find more information on our terms and policies in Precoro’s Knowledge Base.
Should you have any questions or concerns after reviewing our policy, please do not hesitate to reach out to us at privacy@precoro.com. Our team is here to assist you.
Other Upgrades:
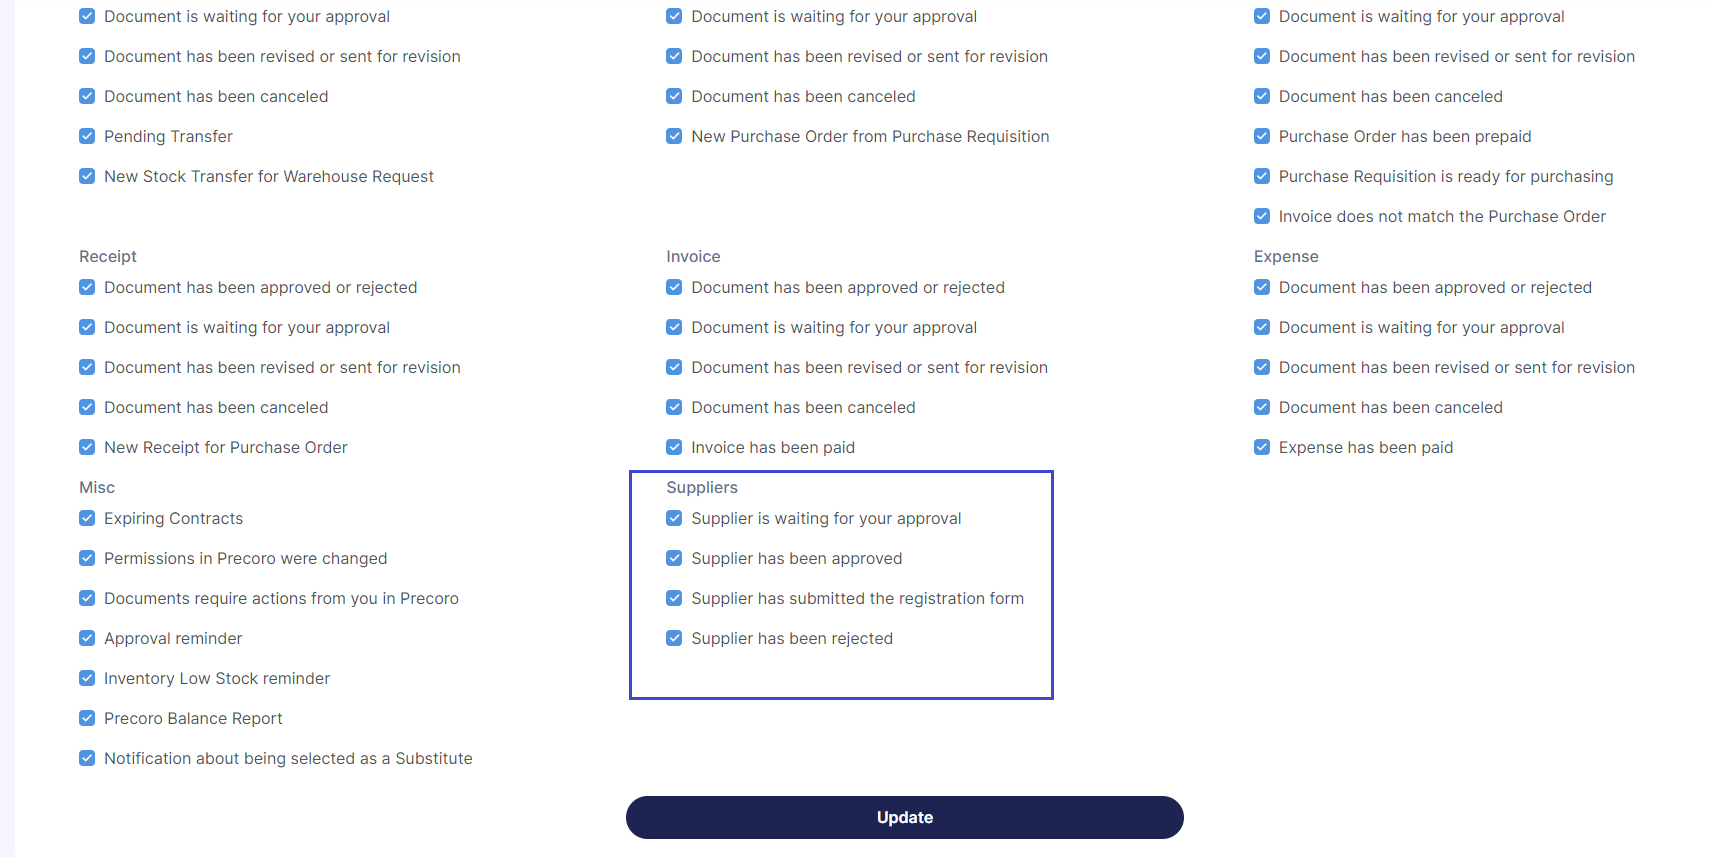
More email customizations
In the email preferences, you can now customize the number of notifications regarding Supplier Approval.
The option to view PO sending status on the PO management page
Tracking the sending status of purchase orders to suppliers is now more convenient. You no longer need to open each document individually; instead you can view the PO status of Sent or Not Sent directly on the PO management page.

New page designs
We have developed a fresh and modern design for the Login, Password Reset, Two-Factor Authentication, and SSO Sign-In pages. This updated design facilitates the user experience and improves the overall usability of these pages.
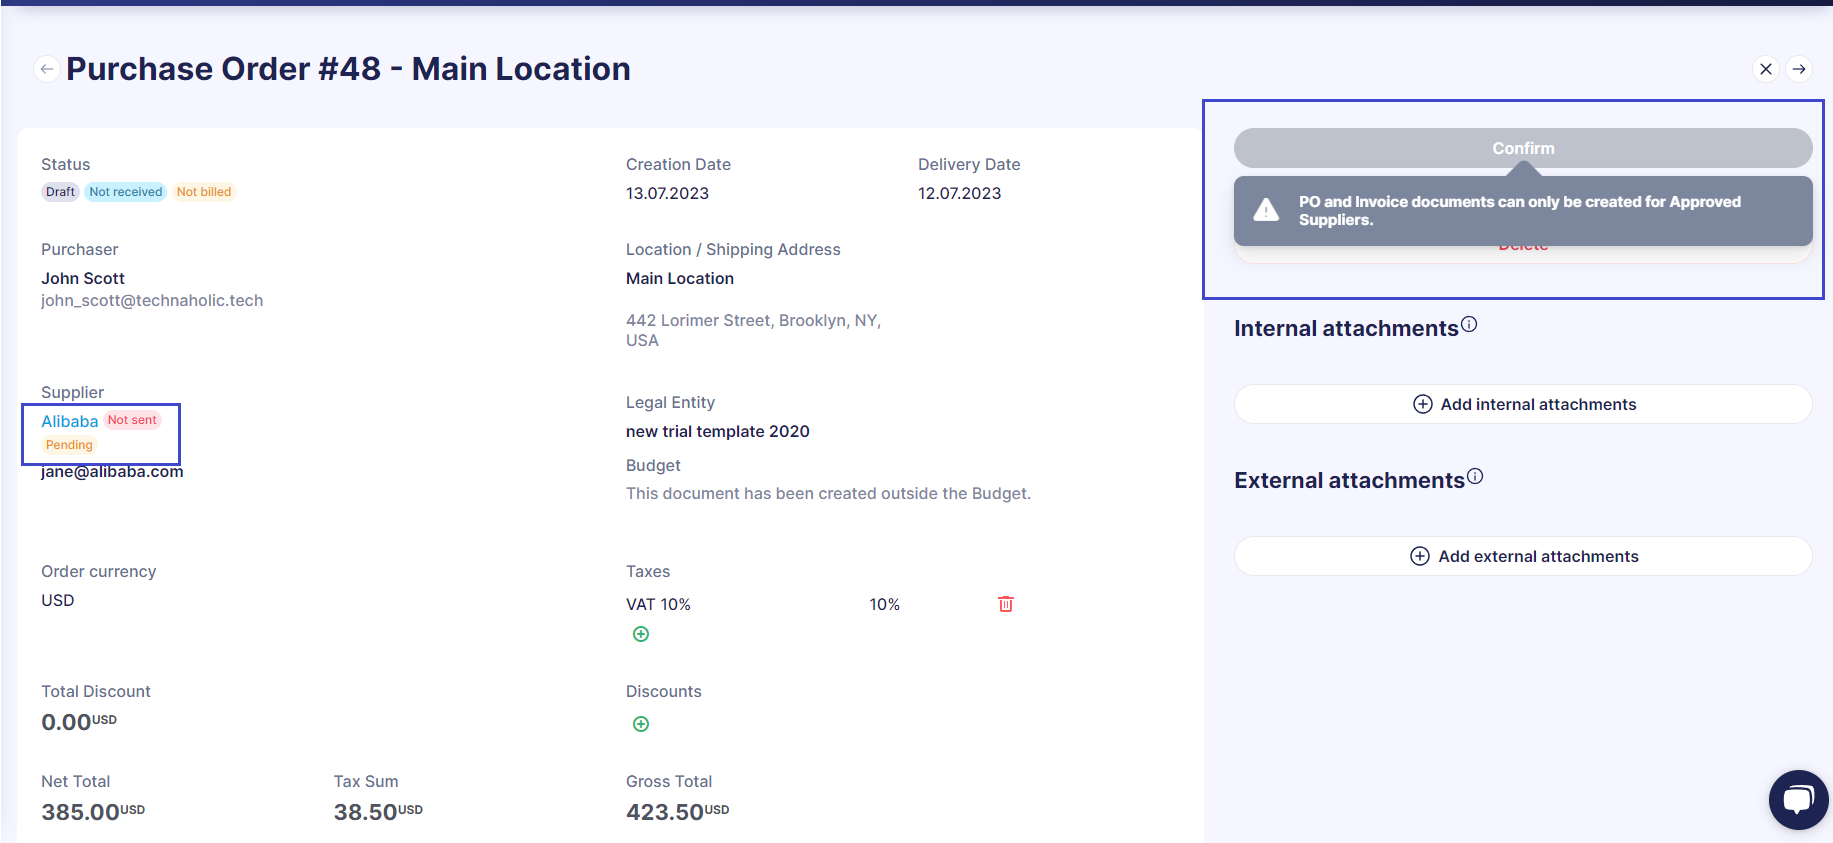
Suppliers must be approved before confirming documents
Users will no longer be able to confirm purchase orders, purchase requisitions, or invoices if the supplier is in the Pending or Rejected status. Documents can only be confirmed for approved suppliers.
💡 Please note that this update specifically applies to companies with an established supplier approval workflow. To learn more about the supplier approval functionality, follow the link to our Knowledge Base.
Thank you for staying with us. Keep an eye out for upcoming releases as we continue to propel forward. 😉


